Alright, fellow adventurers, gather 'round the campfire (or your Switch screen)! Remember those head-scratching Lomei Labyrinths from Breath of the Wild? Well, Tears of the Kingdom decided to take that delightful confusion, triple it, and throw it into the sky and the depths. Lomei Labyrinth Island isn't just a maze; it's a three-course meal of frustration served on a platter of ancient Zonai weirdness, and I, your slightly bewildered guide, just finished choking it down. Think of it like trying to assemble IKEA furniture while blindfolded and riding a unicycle – unnecessarily complex but oddly satisfying when you finally get that last bolt in.
🌊 How To Not Drown in Confusion: The Surface Section
First off, this bad boy isn't conveniently located. Oh no. It's chilling out in the northeast sea like a grumpy old hermit crab guarding its shell. Forget easy climbing; the entrance is way up high. Your best bet? Glide like a majestic, slightly panicked seagull from the Akkala Tech Lab. Trust me, it beats trying to build a rickety flying machine that'll probably dissolve halfway there.
Inside, you'll find a Zonai slab looking like my grandma's cryptic shopping list and a researcher's journal. Read it! It's basically the maze's instruction manual, written by someone who clearly also got lost. The whole place is lightly flooded, making navigation feel like wading through a giant's forgotten bathtub. Forget building fancy Zonai contraptions here – the corridors are tighter than Link's budget after buying a new set of arrows.
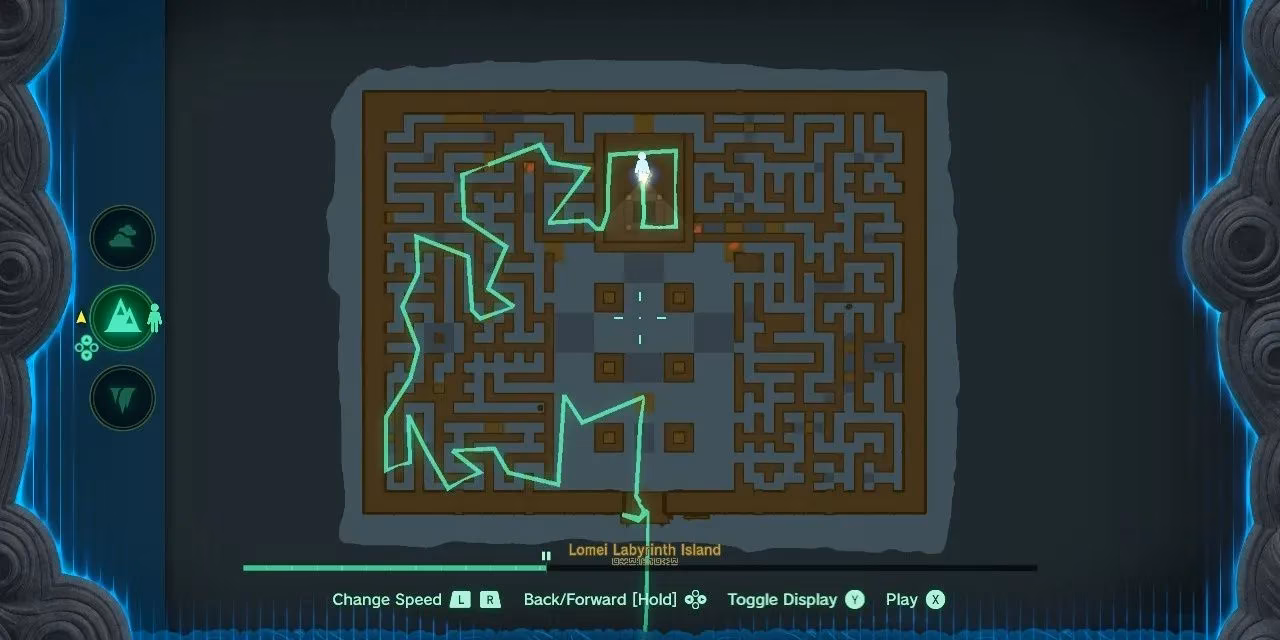
Your lifeline? Follow the Acorns! They're like tiny, edible breadcrumbs left by a very considerate (or hungry) squirrel. Here’s the step-by-step, because getting lost here is easier than losing rupees in Gerudo Town:
-
Enter & Spot: Head straight for the central platform in the water. Grab that first acorn! 🥜
-
Bottom Left: Let the next set of acorns guide you towards the bottom left maze entrance.
-
First Left, Then South: Keep following the path, take the first left turn, then head south.
-
North to Wall, Right, South: At the next intersection, go north until you hit a wall. Take the right, then head south.
-
Right, North, Left: At the next intersection, turn right, go north again, and take a left at the intersection.
-
Through the Wall & South: Spot an opening in the wall, walk through, then take the next south turn.
-
Stairs & Victory!: Find the stairs, climb them like your stamina depends on it (it kinda does), and boom – central chamber!
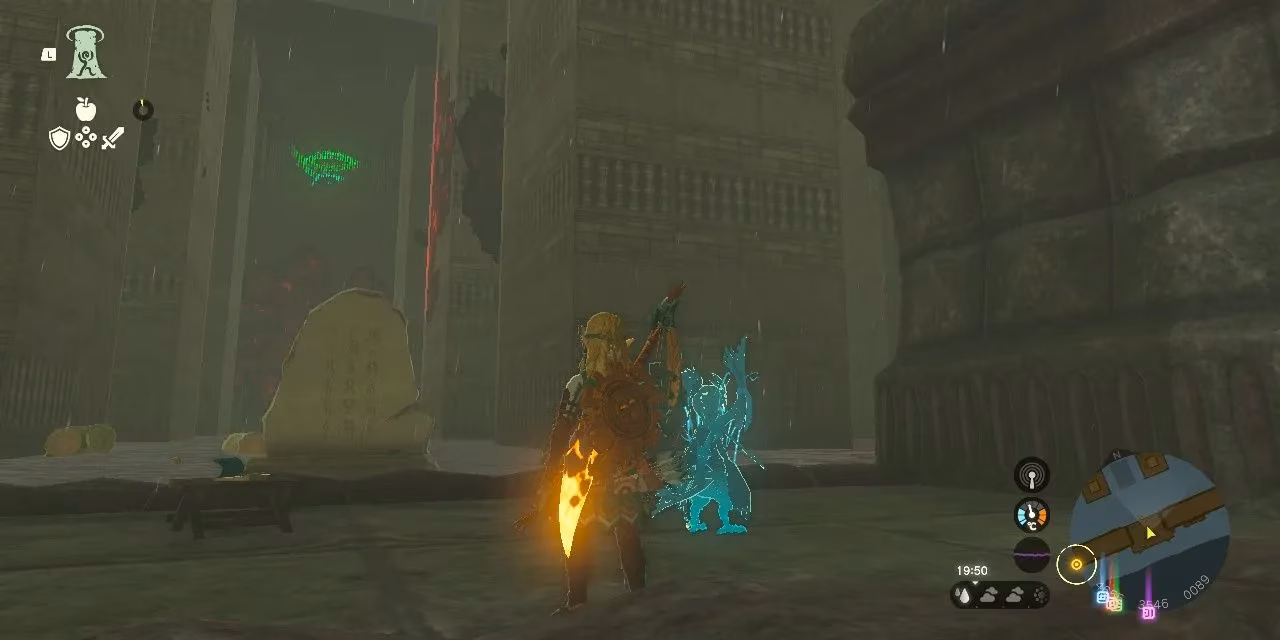
Here awaits the Igashuk Shrine, another journal (these guys loved writing), and the all-important Zonai Touchstone. Activate that Touchstone! This unlocks the Lomei Labyrinth Island Prophecy side quest and opens the gates. Phew, surface done! Now, upwards!
☁️ Sky High Shenanigans: Reaching for the Clouds (and Maybe Crying)
Getting to the sky section? It's like trying to hitchhike to the moon. No nearby islands, just vast, empty sky and those annoying Aerocudas circling like overgrown, angry dragonflies. Your launchpad? The Ulri Mountain Skyview Tower. Glide towards the sky island directly above Bloodleaf Lake (approx. Coords: 4274, 3118, 0784).
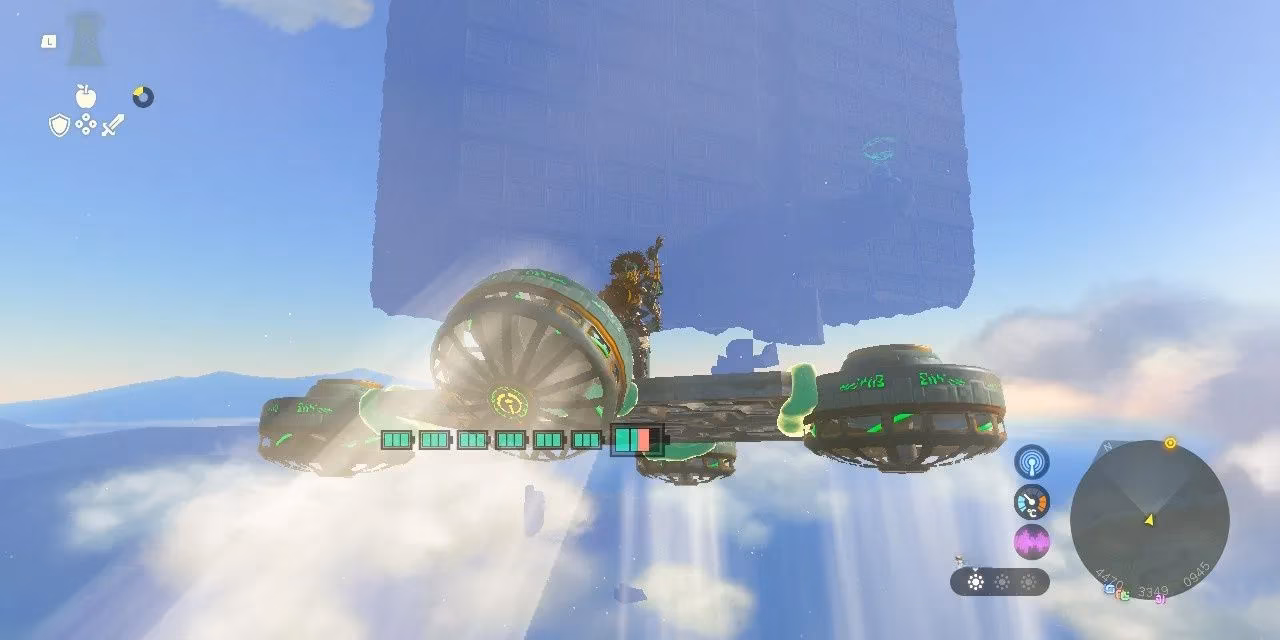
WARNING: This glide is longer than a Korok's explanation of why they hid under that rock. Bring MAX stamina food/elixirs! Arriving feels like winning an Olympic medal, except the only spectators are Aerocudas judging your landing. Thankfully, pre-built flying machines are there, ready to whisk you to the sky labyrinth entrance.
First things first: Activate the Mogisari Shrine! This is your 'Get Out of Jail Free' card if you get hopelessly turned around (you will). Then, hit the Zonai Touchstone. A mysterious voice announces Four Terminals are hidden within. No acorns here, folks. Just pure, unadulterated maze. It's like navigating a hedge maze designed by a particularly sadistic garden gnome after he’s had three cups of espresso.
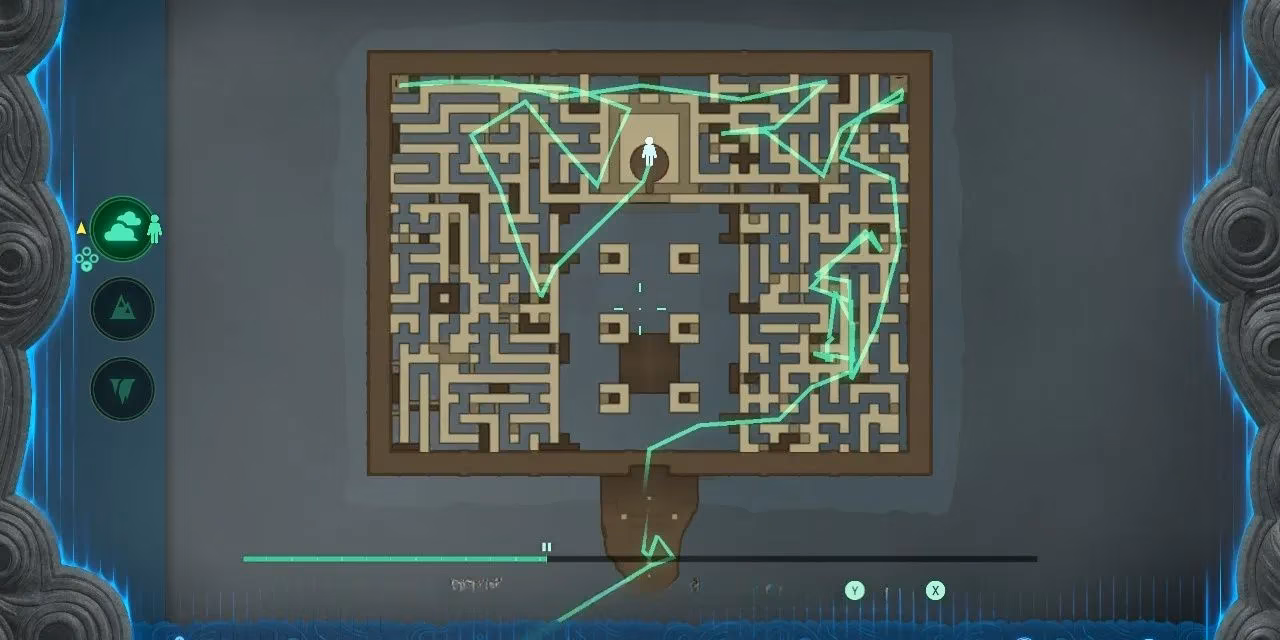
No strict order, but I went counter-clockwise and lived to tell the tale. Follow my path if you value your sanity:
-
Right & Left: Immediately take the first open wall on your right. Keep left until the next opening.
-
North, Right, South: Follow the path north until you can turn right. Go south to find Terminal 1.
-
Backtrack & Northeast: Go back to the previous junction. Head northeast, hug the wall, turn left when forced.
-
Left, Forward, Left: Out of the corridor? Take the next left, go forward over platforms/grates, then left again to Terminal 2.
-
South, Left, North, East: Head back south to the platform/grates, take the next left. Go north immediately, hug the wall east to Terminal 3.
-
Center, Bottom Left Exit: Back to the center of the north wall, enter the central chamber, take the bottom left exit.
-
North, Left, South, Right: Go north, take the second left opportunity. Follow south, turning right at every intersection. Activate Terminal 4!
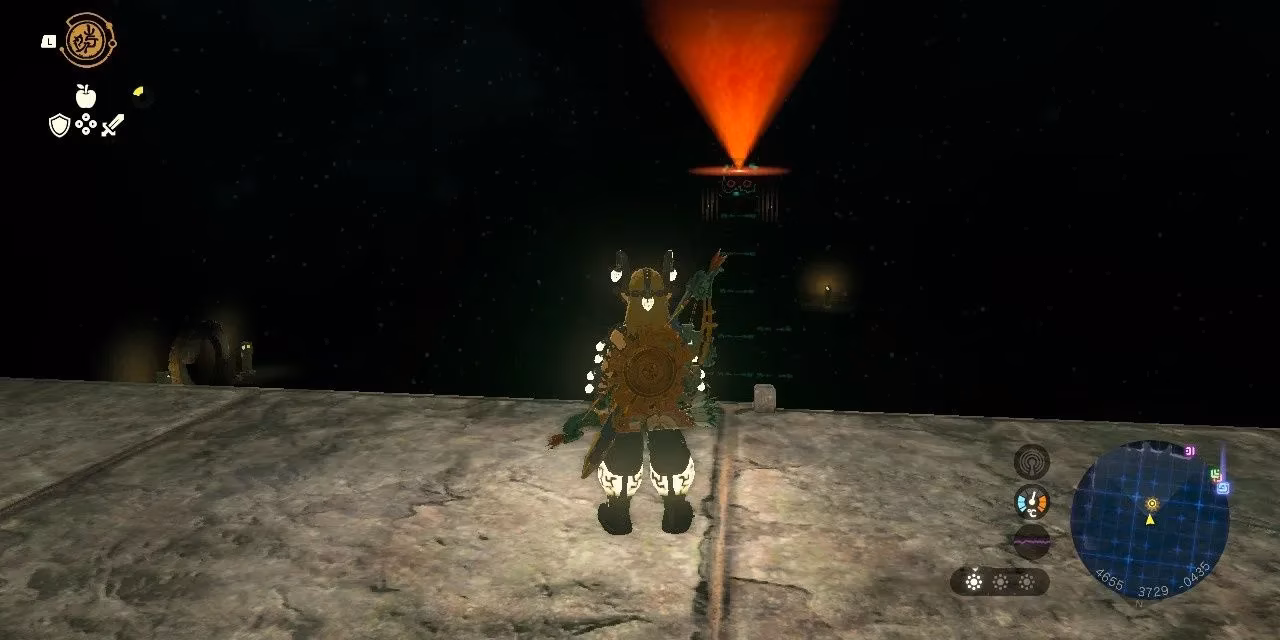
Activate all terminals, and a mighty updraft launches you to the labyrinth's peak like you're a leaf in a cosmic vacuum cleaner. Activate the touchstone there, and a platform appears for your final descent... into darkness.
⬇️ Descending into the Depths: Where Rocks Try to Kill You
If the surface tested your sense of direction and the sky your patience, the Depths section is here to punch you in the face (metaphorically... mostly). Forget puzzles; it's combat time! At the bottom of the stairs, a Flux Construct III awaits, looking like a toddler's chaotic block tower that gained sentience and a bad attitude.
Fighting Tip: Tear it apart like it's cheap wrapping paper! Focus on its glowing core – the weak spot. It's less 'epic boss battle' and more 'aggressively disassembling IKEA furniture gone rogue'. Once it's reduced to a sad pile of blocks, activate the Zonai Touchstone. Your reward? A treasure chest containing the glorious Evil Spirit Armor! Perfect for sneaking up on unsuspecting Bokoblins... or avoiding your responsibilities.
CONGRATULATIONS! The Lomei Labyrinth Island Prophecy quest is complete! You've conquered land, sky, and underworld. Before you peace out, be extra thorough: Activate the Kuhsagi Lightroot nearby. You've earned that completionist sparkle! Now, go forth and brag – you've navigated the trifecta of Zonai absurdity!
Comments